Bafang Electric Conversion on the Gazelle Cabby

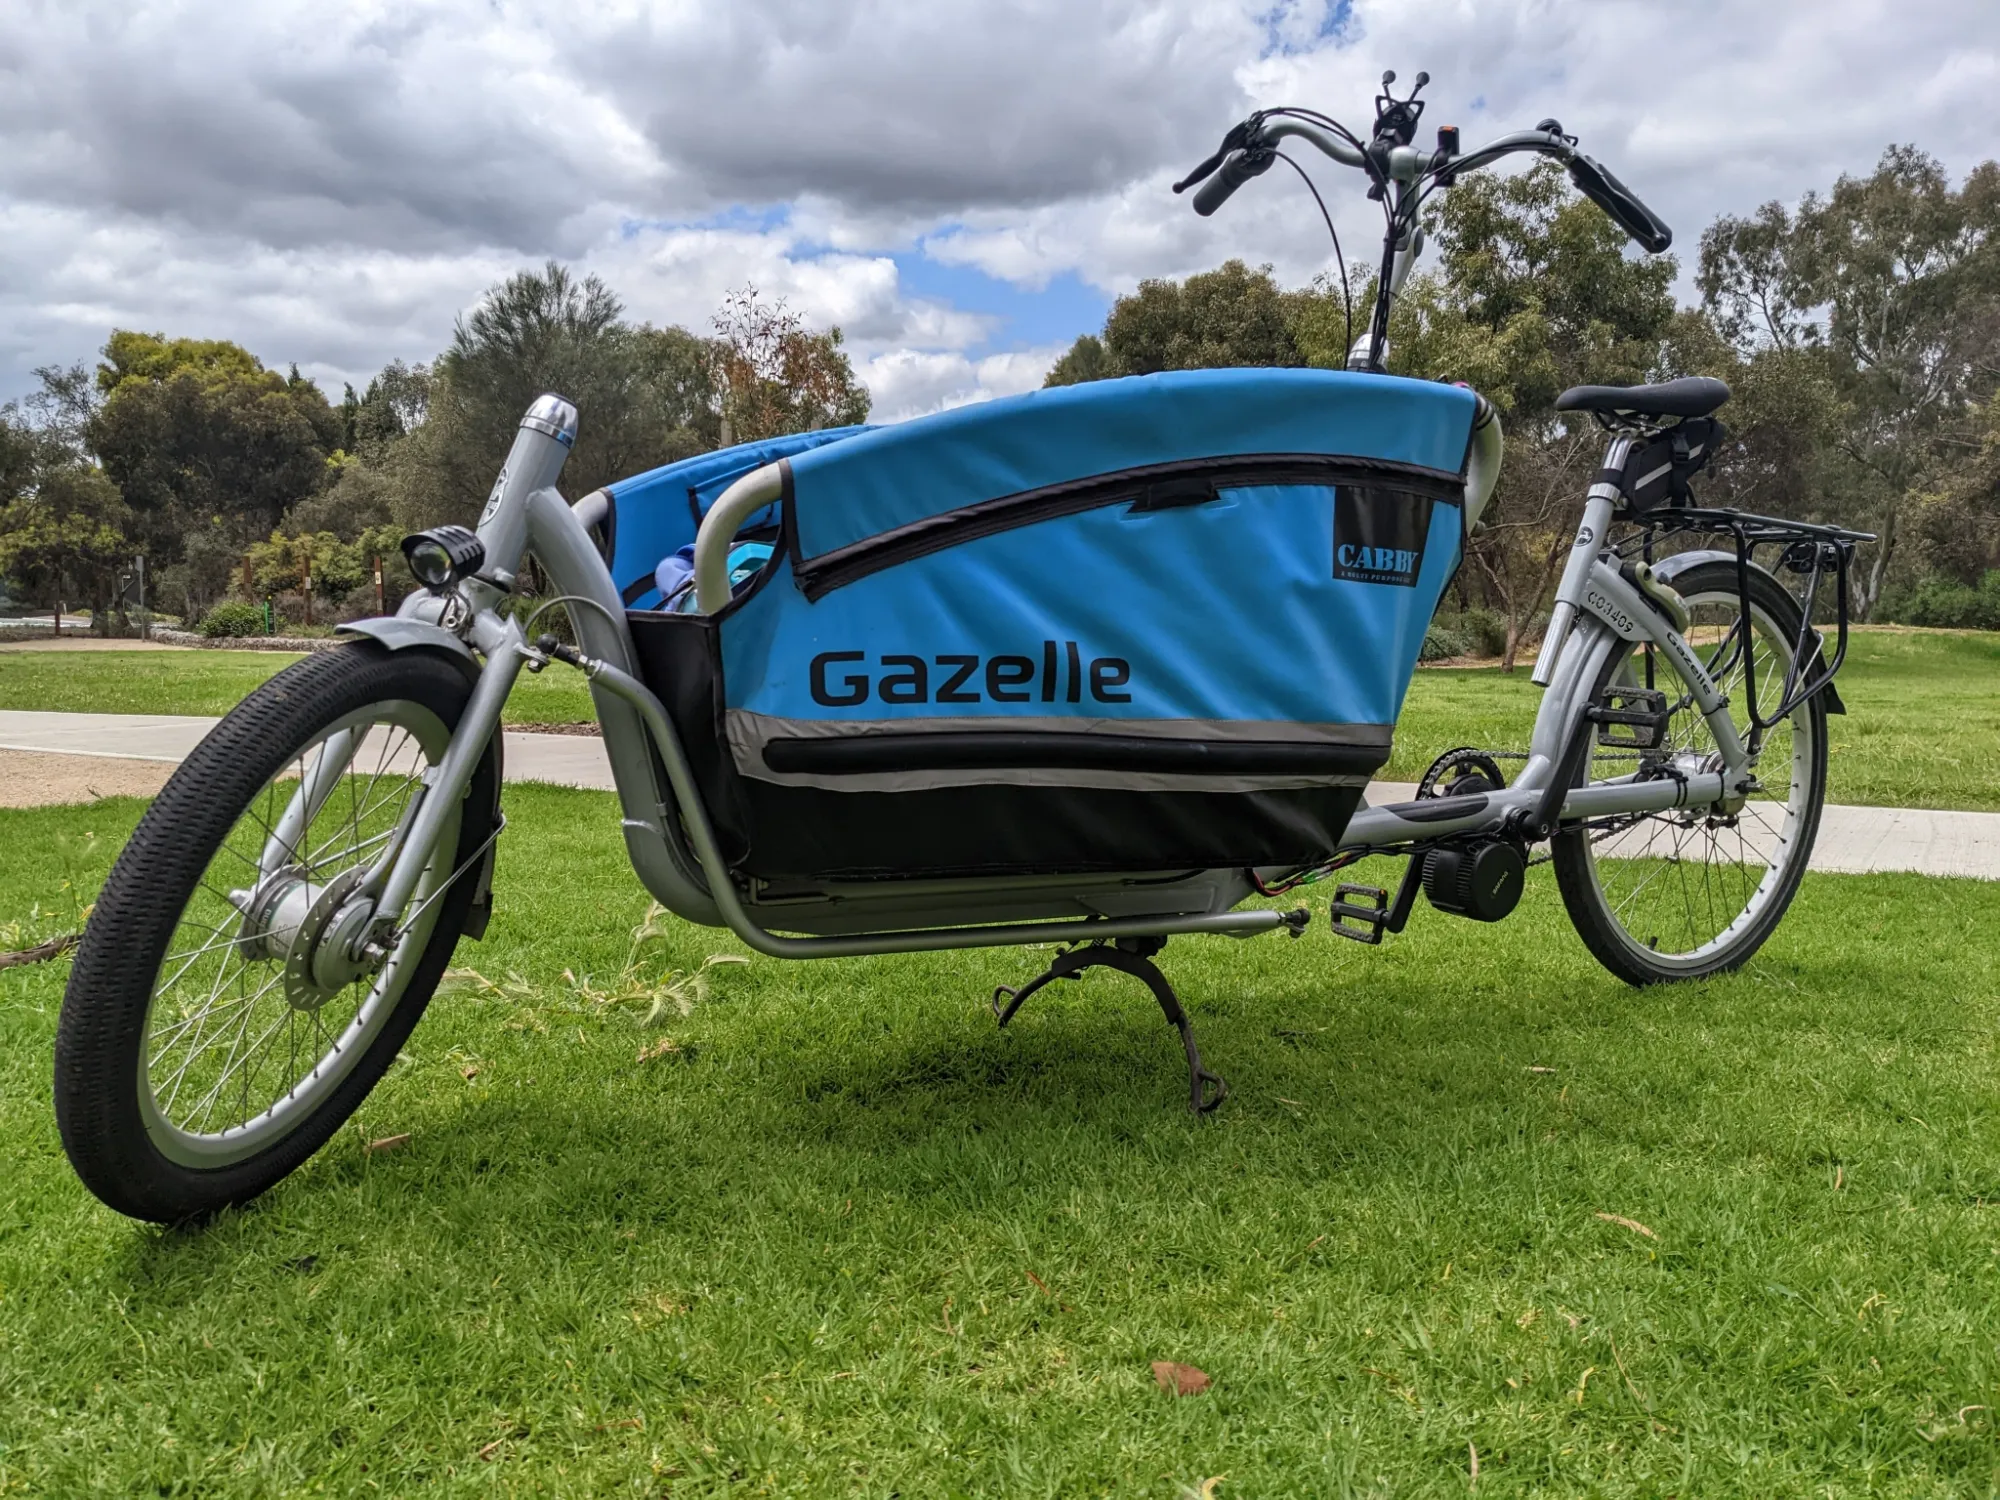
The whole reason for getting the Cabby in the first place was to electrify it. While it was rideable, really it was too much effort with the hills. As I said in the last post, what we really wanted was a budget-friendly entry into electric cargo bikes. The Cabby is a nice base for an electric conversion.
An electric conversion transforms the Cabby. The bike is so much more useful and fun now.
Here are the steps I went through to do the conversion.
Other people have done this!
You can convert the Cabby in a couple of ways, and if you search forums (especially Dutch forums) you will find sucess stories. You can get an electric motor hub for the front wheel. I wanted to do a mid-drive conversion so that I would have the motor running through the gears, which is better for hills. Other people have installed a Bafang mid drive to the cabby.
What did I buy?
I went with a Bafang BBS01 36V 250W conversion kit from Cap Rouge, with a 20Ah battery. I went with a 44 tooth chainring, which is the smallest on offer, to prevent the motor getting bogged down on hills. This is still considerably bigger than the 38t that is standard on the Cabby (update: I may go smaller still). I got the tiny SW102 mini display, as I didn't want a giant screen drawing attention to itself.
I chose this motor because it is the only legal way to do the conversion. Our laws require pedal assist eBikes to be no more than 36V, 250W. The Bafang BBS01 meets this requirement, and also has the power output stamped on the shell, another legal requirement.
Yes, you could go the BBSHD and have way more power. But you'd be breaking the law, and probably run into insurance problems if you were in a crash. Not a great idea for a bike designed to carry children. Also, the brakes on the Cabby aren't great, so more power means more difficulty slowing down.
Cap Rouge were great to deal with and the kit and battery arrived quickly.

A newer product on the market is the TongSheng motor. It seems like a good option because it uses a torque sensor to assist depending on how hard your pedalling, where as the Bafang uses a simpler cadence sensor. However, the TongSheng is more compact with less spacing around the bottom bracket. I went with the Bafang because I didn't want to risk it not fitting.
Installation Process
Allow yourself 2-3 hours and maybe a couple of beers on a Saturday afternoon to get this done.
Tear Down
The first thing to do is remove the stuff no longer required or in the way. This includes:
- Grips
- Brake levers, since you'll be using the ones in the kit, which include a switch for cutting the motor. Alternatively, you can get sensors that work with the stock levers
- Chain guard and chain. You'll need to get a new chain to fit the bigger chainring of the Bafang
- Crank arms. The Cap Rouge kit included a crank puller tool which worked fine
Removing The Bottom Bracket
The hardest part of the installation process is removing the press-fit bottom bracket that comes on the Cabby. The trick is that you just need to hit it harder. Hit the spindle with a hammer from the non-drive side, hard, for a long time, and it will eventually come out. I've read others applying heat but I didn't find that really helped.
Once you've got all the bits of the bracket shell out of the drive side, repeat the process on the non-drive side.
Get violent. I went into this hoping to be able to save everything in order to be able to undo the conversion, but the bottom bracket just is not reusable. It will end up in pieces on the floor.

Install The Motor
Once the bottom bracket is out of the way, you can start installing the motor as per the instructions (if you received any). You thread the motor through the bottom bracket and tighten using the tool provided.

Now, the outer diameter of the motor is smaller than the inside diameter of the bottom bracket shell. You may want to make some shims to fill the gap and prevent movement. You could machine something from aluminim, or 3D print something, for example. However, I found that the shape of the motor fitted to the outside of the bottom bracket fairly snug, which prevented movement once tightened.
I'll keep an eye on this. It's possible that if you really jumped on the pedals you could cause the motor to move, but I haven't noticed any problems so far.
New Chain
Due to the increase size of the chainring, the old chain won't fit and will need to be replaced. The good news is that a single speed Shimano Nexus chain costs about $20. Loosen the chain tensoner screws way out, so that you can make the chain as short as possible. Size up the chain and use a chain-breaker to make it the right size. Then tension the chain as necessary.
Once the chain is on you may as well go ahead and put the new crank arms and your pedals back on the bike. I also used this as an opportunity to replace the old Gazelle pedals with something more casual.

Install Controls and Wiring
Next up is to install the new brake levers and the Bafang display. I also took this as an opportunity to replace my brake cable housing and install the correct gear shifter for the Nexus 7. You also need to install the speed sensor on the chainstay and magnet on the rear wheel. The magnet my kit came with used a tamper-proof torx screw, which I didn't have the tool for. A bit annoying, but not a deal breaker.
You want to spend a bit of time making the wiring up to the handlebars clean. If you were really pedantic, you could wrap the entire loom into some wrap, but I just used plenty of cable ties to bring everything together. I ended up with one chunky loom running up the left side of the frame.
Battery Placement
Because the Cabby box is made of fabric there actually aren't too many places to mount the battery. Initially I just hid it under the kids seat inside the box. In the end I used hose clamps to fit the battery to the steering tube. It looks neat, and you have easy access for removing the battery to charge.

I think a better option would be to use a battery that is integrated into a rear rack. It's just that the cabby has such a good rack on it as standard it seems a shame to throw it away. So steering tube battery works fine.
And that's it!
Well more or less. As part of this job I also switched the broken rear light to a Bafang unit that is powered from the main battery. I changed the front light to an LED one, but that continues to be powered by the dynamo front hub.
I also didn't bother to install the thumb throttle, so this is pedal assist only, at least for now.
On The Road
With electric assist the bike is transformed. It is comfortable to ride up hills, and no effort at all to maintain 25-30km/h on flats. The Bafang motor is silent, and works well with the Nexus rear hub, even without a gear-change sensor.
Now the bike is still heavy, and you could argue that the 250W BBS01 is a little under powered up hill. I find myself going 10-15km/h up hills, rather than 25. That's fine for me, and much, much better than with no assist. As I said above, legality was important for me.
I still haven't figured out the range of the 20Ah battery. I've been charging the battery ahead of long trips because I don't want to risk getting stuck a long way from home. I'll update when I know, but it's at least 60km on maximum assist.
The Cabby is now the ideal vehicle for childcare runs, groceries, trips to Bunnings, as well as recreational outings. We've taken it along Linear Park to the zoo, to breweries in Thebarton, etc. It's great.
Economics
The purpose for us getting the Cabby was to get into electric cargo bikes without having to spend $8-14k. So, how have things gone?
| Item | Cost |
| Gazelle Cabby from Gumtree | $1000 |
| 10 Years Of Maintenance | |
| Saddle | $49 |
| Brake Cable Housings The bike needs 3m to do the front and rear brakes | $30 |
| Shimano Nexus 7 Shifter | $33 |
| Bafang Electric Conversion | |
| Bafang BBS01B 250W 36V kit, with 20Ah battery note: you could go a smaller battery and get this way under $1000 | $1297 |
| Shimano Nexus Chain | $18 |
| New Pedals | $19 |
| Total | $2446 |
Mathematics
So just under $2500. This is still a fair bit of money, but is far, far less than half the price of the cheapest new electric cargo bike. And the right way to think about this is it's replacing a car. Every KM ridden saves money and makes you and the world healthier.
I'm calling this a complete success. Great job everyone!